
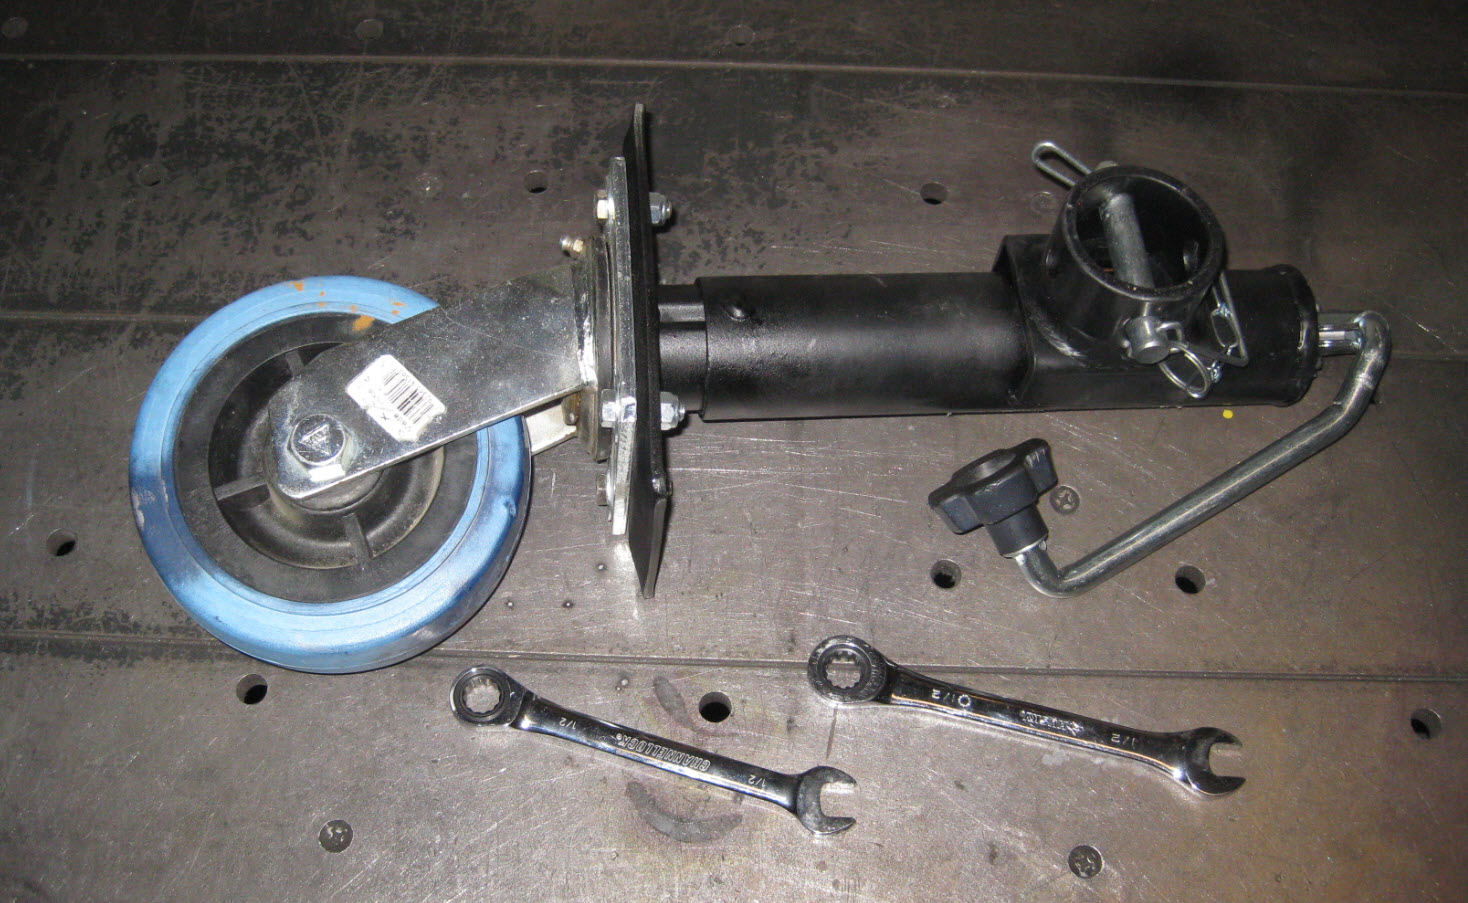
Original Trailer Jack & 3rd Wheel that is Too Long for this Project
If possible, I like to use existing old parts & scrap metal in my new projects …
Thus my favorite hobby is designing ‘Scrap Metal Engineering’ items.

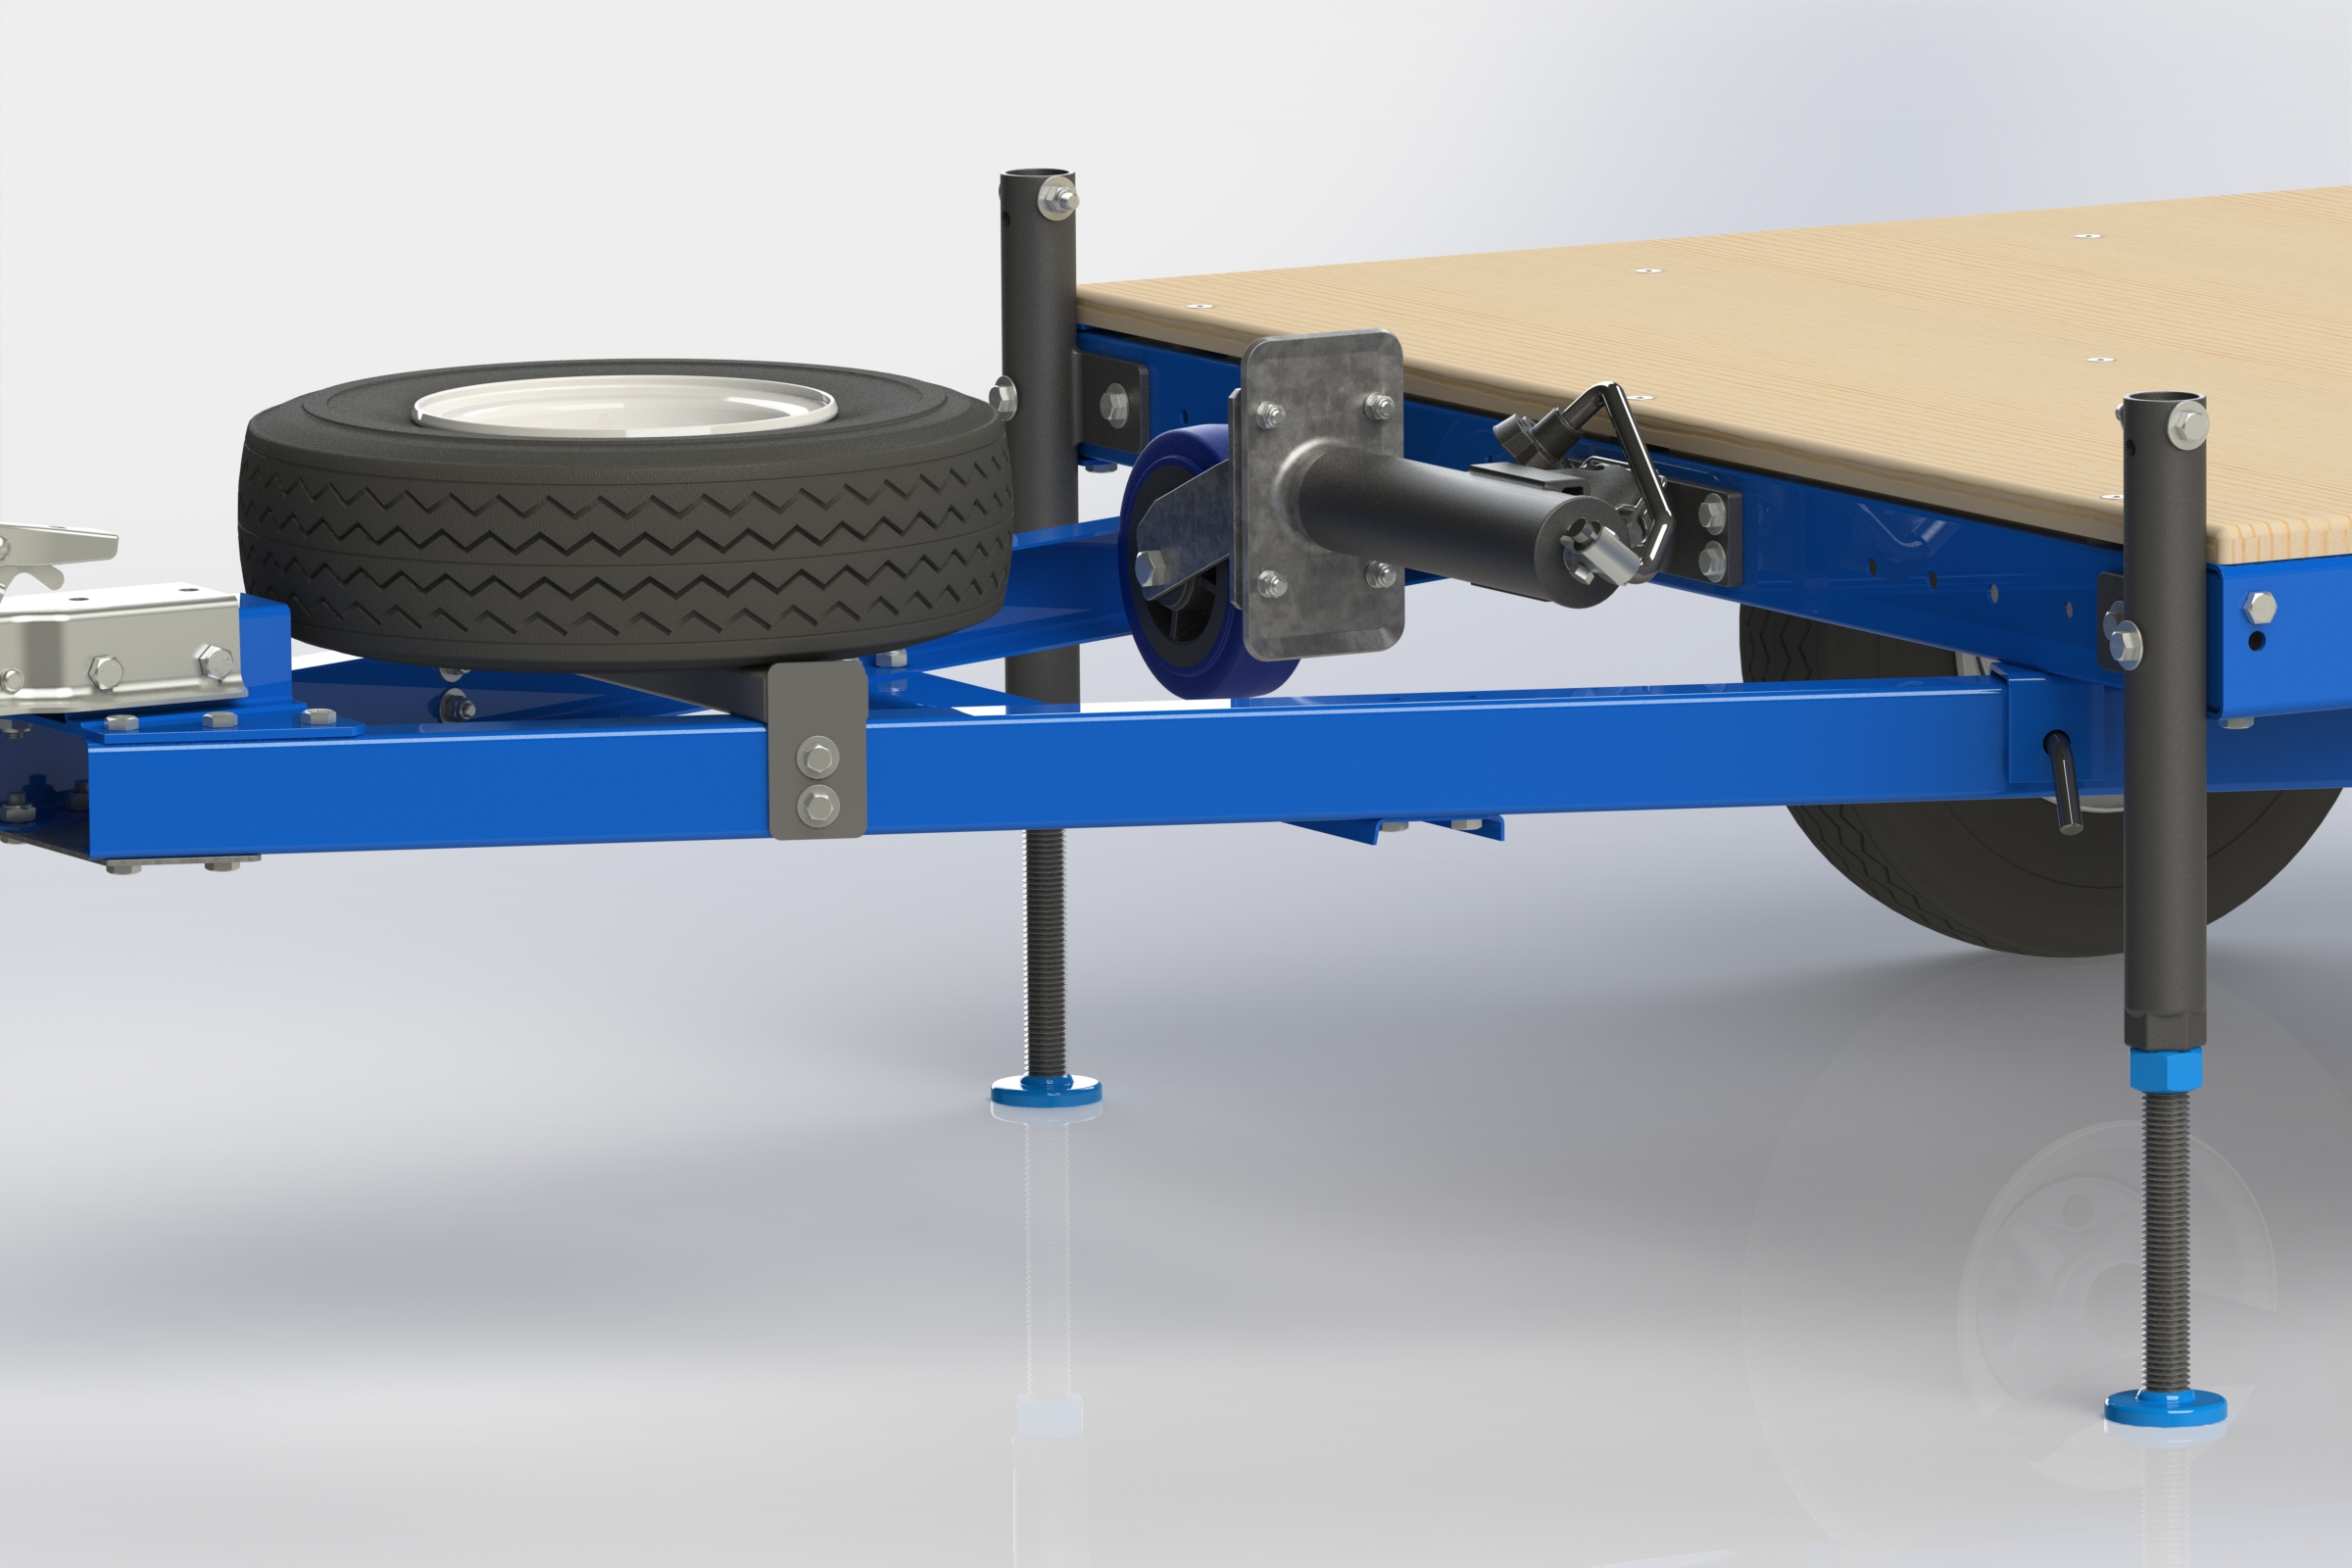
SolidWorks Rendering Showing the Trailer Under the Chain Hoist Arm
A previous post shows SolidWorks CAD renderings and discusses a ‘Workshop Trailer Platform‘ that will allow me to move parts on a trailer with a vehicle; yet, will also allow me to remove the trailer’s Tongue/Yoke when it is in my shop to use the trailer as a Workshop Platform Table.
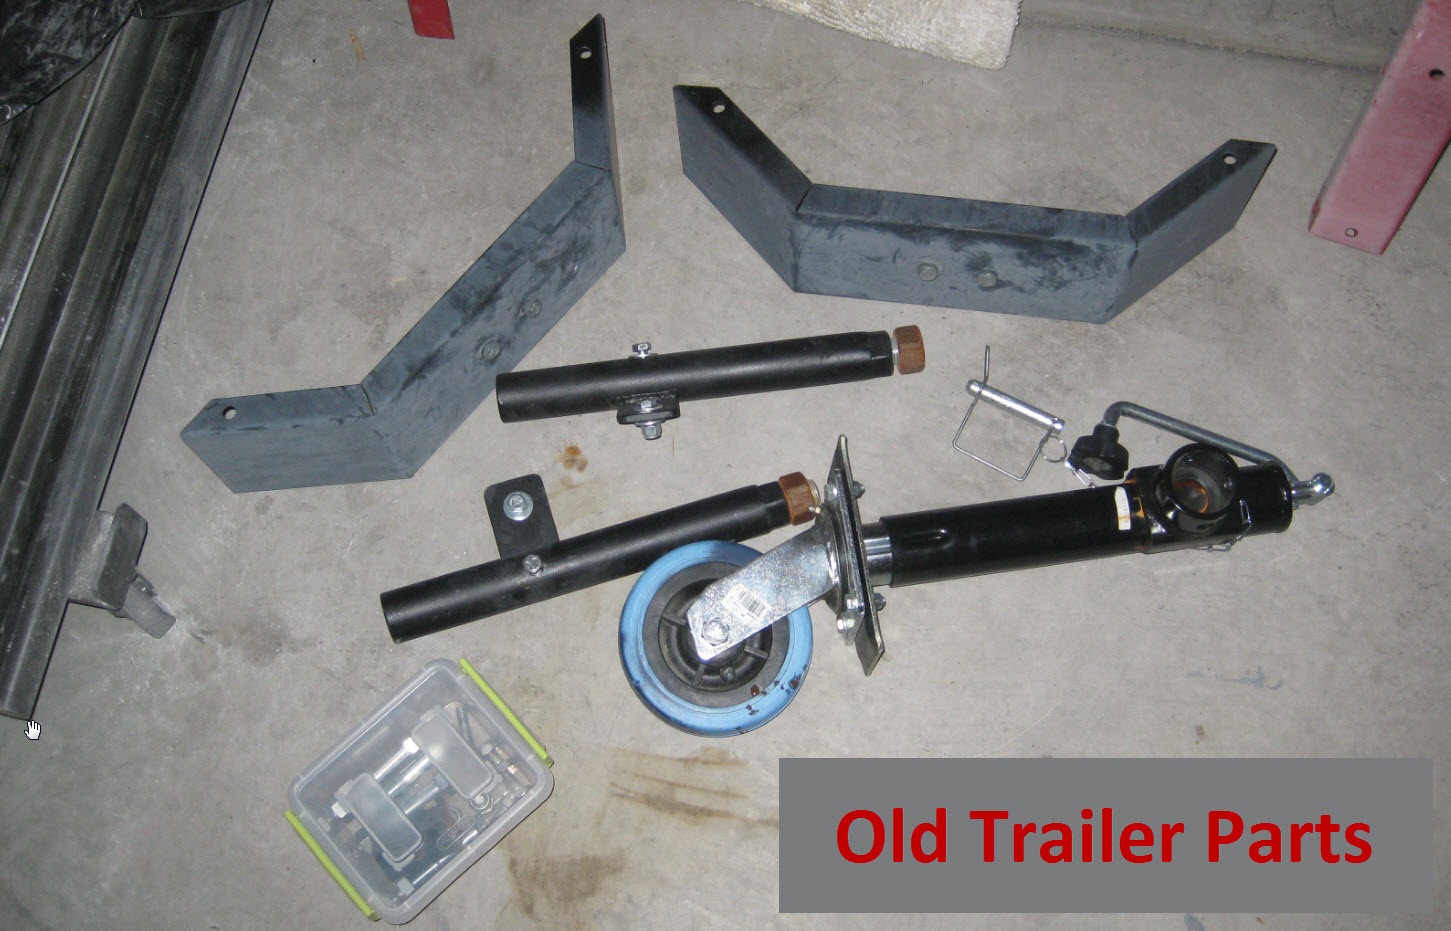
Existing Trailer Parts I Decided to Use Again on the New Workshop Trailer
A key part to being able to use the trailer as a Workshop Platform is the 3rd Wheel that is attached to a Trailer Jack … Unfortunately, the old 3rd Wheel trailer jack unit I have is too long for this new project.
While I could buy a new Trailer Jack … Where is the fun in that?

Trailer Jack & 3rd Wheel in the DOWN position
Trailer Jack & 3rd Wheel in the UP position

Modified Trailer being used as a Work Platform for Engine
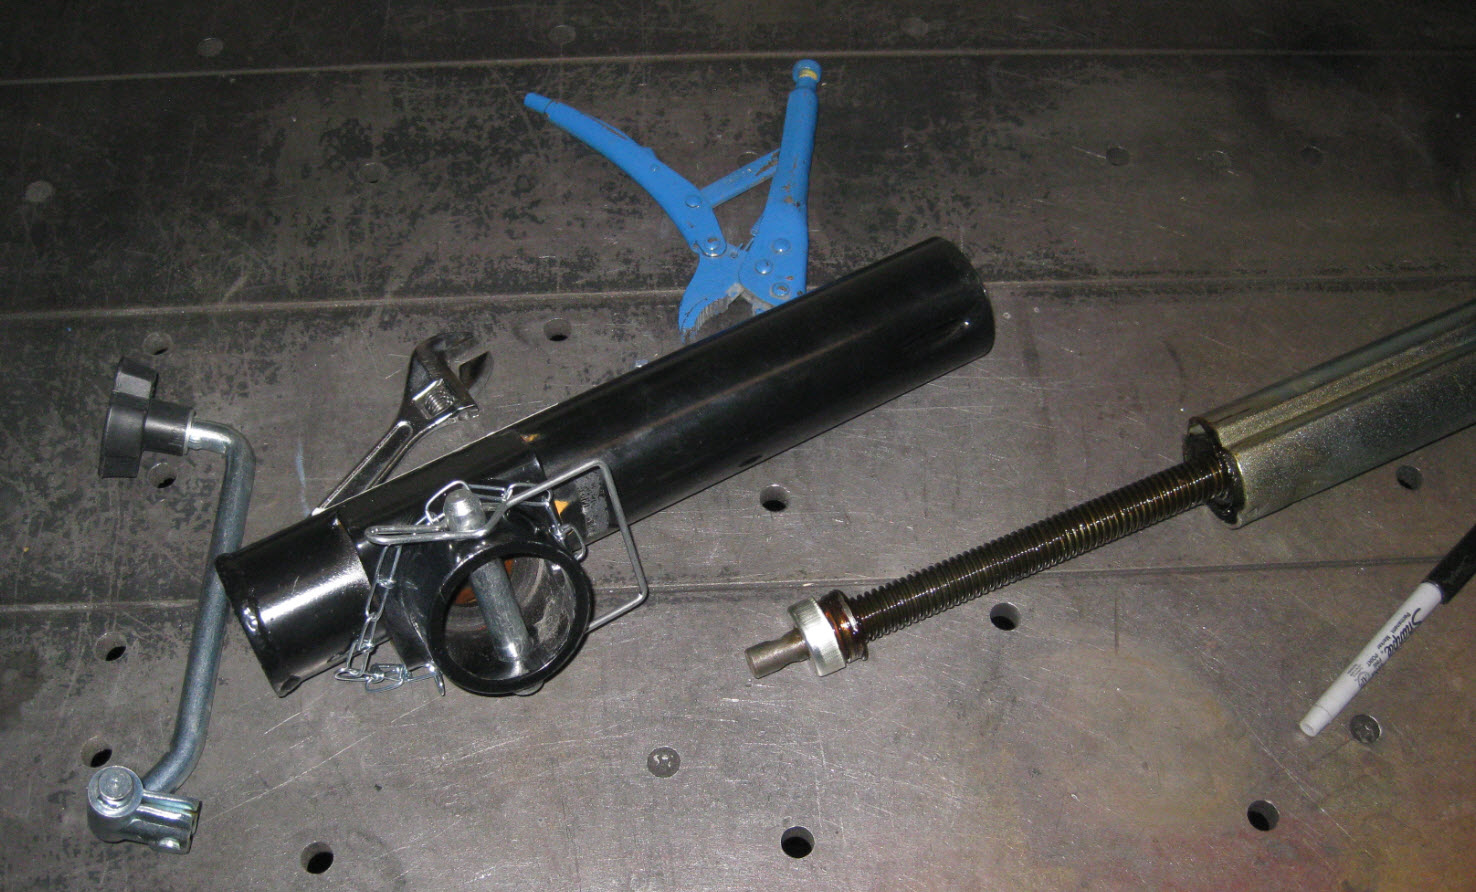
The first step was to take off the wheel, and also the turning handle, so I could remove the upper trailer jack body from the lower inner pipe and foot pad.

Trailer Jack & 3rd Wheel Attachment Taken Apart
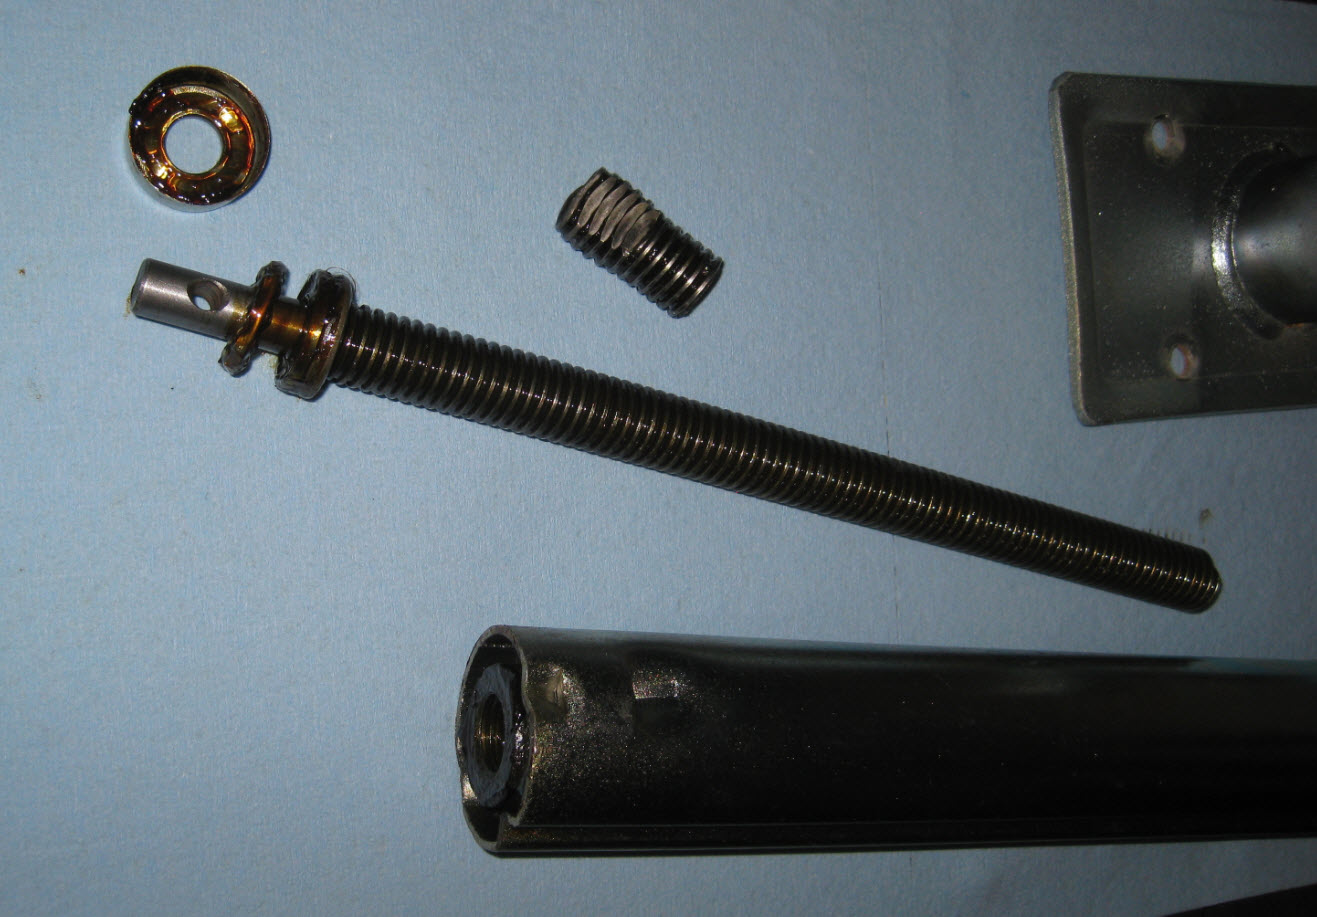
Once the inner threaded rod ‘Lead-Screw’ was exposed, I was then able to plan how to cut 3.25″ out of the inner tube without damaging the threaded rod that is used to raise & lower the trailer jack.
Threaded Rod ‘Lead-Screw’ inside the Trailer Jack
By screwing the threaded rod away from the Foot Pad end of the inner tube I felt fairly certain I would not damage any internal components.

Cutting Extra Length Off the Trailer Jack’s Foot Pad Pipe
Used the metal band-saw to cut 3.25″ out of the inner tubing …

Foot Pad Cut Off of the Inner Pipe with Metal Band-Saw
Was happy to see that nothing inside the tubing was damaged after the cut …

Other End of Lead-Screw inside the Foot Pad Pipe
With the inner tubing cut and removed the end of the threaded rod was visible exposing the crushed area of the threaded rod …

Close-Up of the Crushed Threads Used as a Turn-Stop
The crushed threads were used as a method to create a ‘turn-stop’ so the threaded rod could not be accidentally over turned and/or removed.

Cutting Off the Crushed Threads Used as an End Stop
I don’t need an end stop, and also wished to remove the threaded rod prior to welding, so I used the band-saw again to cut off the crushed threads …

Crushed End of Threaded Rod Cut Off
Used the extra large Vise-Grip pliers to hold the thread stable while cutting …

The Cut Threaded Rod ( Lead-Screw ) Can Now Be Removed
By cutting off the crushed end, I was able to remove the threaded rod without having to remove any of the heavy grease so I could just screw everything back together after all the welding was finished.
The internal parts are covered in a heavy grease
The next step was to cut 3.25″ out of the trailer jack main body tubing …

Cut Extra Length Off the Jack’s Body Pipe with the Metal Band-Saw
I then cut the left-over tubing off the foot pad and cleaned it up with a grinder to prep it for re-welding the foot pad back on.

Foot Pad Ground Off and Prepped to be Welded
The band-saw made a nice straight cut so the fit-up for welding was easy …

Foot Pad and Inner Pipe Fit-Up Ready for Welding
Once the welding was completed I knew the length to cut the threaded rod …

Welded the Inner Pipe to the Jack’s Foot Pad
The final step was to recreate a metal tipped point guide to fit into the notched groove area to keep the inner tube from spinning as the handle is turned.

A point of Metal is needed to fit inside inner Pipe Notch/Groove
The GREEN Arrow shows the original notch guide location and the RED Arrow shows where the new guide point of metal was added …

Used a Piece of Threaded Rod to Create the Notch Metal Point
Didn’t need to be anything special so found a piece of scrap threaded rod …

Drilled a Hole for the Threaded Rod Point to Fit Into
Cut off and rounded the end of the small threaded rod and drilled a hole …

Notch Point ( Threaded Rod Tip ) Ready to be Welded
Used some spacers to get the correct depth and welded in the guide notch tip …

Painted the Finished Modified Trailer Jack
Painted the finished ‘modified’ trailer jack unit and bolted on the wheel …
The Modified Trailer Jack & 3rd Wheel Shown in Short Adjustment Position
The trailer jack has a shorter adjustment allowing to store sideways on trailer.

SolidWorks Screen-Capture of the 3rd Wheel in the Stored UP position

Longer Adjustment Position Shown ( Still Goes Much Longer )
Don’t need it to expand very long so it can go much longer than I will ever need.

Finished Modified 3rd Wheel Unit Ready for Workshop Platform
Cut off the extra metal on the bottom foot pad of the trailer jack so when the jack with 3D-Wheel is turned sideways it still allows clearance if I want to put items that hang over the front of the trailer.

Blue Arrows Show the Metal that was Cut off the Foot Pad
All Done!! One part finished for the Workshop Trailer Platform … Yay!
I will UPDATE this Post when the Trailer Platform Project is finished.
… CHEERS!!
. . . .

Hello, I was looking at the interesting projects that are in the web of CTMProjects and saw something that caught my attention, and was supported by the band saw: https://ctmprojectsblog.files.wordpress.com/2015/11/ cut-jack-foot-pat.jpg
I have the same model and saw a few months ago also thought to give a movable table to move at ease.
Could you give me some references or measures of the band saw table. Thank you.
Best regards from Argentina !!
I will draw in the band saw table and put the dimensions on website in a few day. Thank you for your comment 🙂
I put a Drawing with Dimensions of Porta-Bandsaw Stand on the website: https://ctmprojectsblog.files.wordpress.com/2013/07/porta-bandsaw-stand-dimensions.jpg
🙂
Hello my friend !, thanks for the reply. I liked the Porta-Bandsaw Stand but I meant this other band saw: https://ctmprojectsblog.files.wordpress.com/2015/11/cut-jack-foot-pat.jpg.
I have a band saw equal to yours and would like to make a similar move easily support. https://www.youtube.com/watch?v=aFliype7DwA
Thanks for your help.
Cheers,
Raul
P.D .: Sorry for my English
I understand now 🙂 I will make some dimension drawings in a few days for the bandsaw stand I made for my Small Workshop Welding Area 🙂
🙂
Pingback: Trailer Platform Levelers | CTM Projects